Scaling with Terraform 🚀
Day 68 : #90DaysOfDevOps Challange

Passionate about building secure, scalable cloud environments. I specialize in AWS & Azure, with hands-on experience in DevOps automation, Python scripting, and infrastructure as code using Terraform.
Currently working in Cloud Security, where I focus on securing cloud-native architectures, implementing security best practices, and automating compliance workflows.
Always open to collaborating on innovative cloud projects that blend automation, security, and performance.
Yesterday, we explored how to create an AWS S3 Bucket with Terraform. Today, let's dive into the exciting world of scaling our infrastructure using Terraform.
Understanding Scaling 📈
Scaling is the process of adding or removing resources to match the changing demands of your application. As your application grows, you will need to add more resources to handle the increased load. And as the load decreases, you can remove the extra resources to save costs.
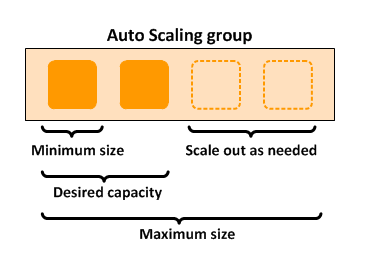
Terraform makes it easy to scale your infrastructure by providing a declarative way to define your resources. You can define the number of resources you need, and Terraform will automatically create or destroy the resources as needed.
Pre-requisites 🔑
Before we start, let's set up a few things:
Create a
terraform.tffile to declare the providers required for the system.terraform { required_providers { aws = { source = "hashicorp/aws" version = "~> 4.0" } } }Create a
provider.tffile to specify the region.# Configure the AWS Provider provider "aws" { region = "us-east-1" }Create a
userdata.shfile with the following content:#!/bin/bash sudo apt-get update -y sudo apt-get install -y apache2 sudo systemctl start apache2 sudo systemctl enable apache2 echo "<!DOCTYPE html> <html> <head> <title>Introduction</title> <style> body { background-color: #d8e2dc; font-family: Arial, sans-serif; color: #3c415e; text-align: center; padding: 50px; } h1 { font-size: 3em; margin-bottom: 20px; text-shadow: 0 2px 2px rgba(0,0,0,0.1); } p { font-size: 1.5em; line-height: 1.5; margin-bottom: 30px; } </style> </head> <body> <h1>This is Dhananjay.</h1> <p>I am going to be a Terraform Pro</p> </body> </html>" > /var/www/html/index.html sudo systemctl restart apache2Create a
vpc.tffile to set up the VPC for our instances.# Create a VPC resource "aws_vpc" "main" { cidr_block = "10.0.0.0/16" tags = { Name = "main" } }Define two public subnets in a
subnet.tffile. We will later use these subnets for multi-subnet initialization in our auto-scaling group.#subnet.tf resource "aws_subnet" "public_subnet_1a" { vpc_id = aws_vpc.main.id cidr_block = "10.0.32.0/20" availability_zone = "us-east-1a" tags = { Name = "public subnet 1" } } resource "aws_subnet" "public_subnet_1b" { vpc_id = aws_vpc.main.id cidr_block = "10.0.16.0/20" availability_zone = "us-east-1a" tags = { Name = "public subnet 2" } }Create an
internetgateway.tffile to configure the internet gateway.resource "aws_internet_gateway" "gw" { vpc_id = aws_vpc.main.id tags = { Name = "internet-gateway" } }Set up routing configurations in a
routetable.tffile.resource "aws_route_table" "route_table" { vpc_id = aws_vpc.main.id route { cidr_block = "0.0.0.0/0" gateway_id = aws_internet_gateway.gw.id } tags = { Name = "route_table" } } resource "aws_route_table_association" "public_subnet_association_1a" { subnet_id = aws_subnet.public_subnet_1a.id route_table_id = aws_route_table.route_table.id } resource "aws_route_table_association" "public_subnet_association_1b" { subnet_id = aws_subnet.public_subnet_1b.id route_table_id = aws_route_table.route_table.id }Create a security group in a
securitygroup.tffile to allow SSH, HTTP, and egress traffic to the instances.#securitygroup resource "aws_security_group" "web_server" { name = "web-server-sg" description = "Allow SSH and HTTP access from anywhere" vpc_id = aws_vpc.main.id ingress { from_port = 22 to_port = 22 protocol = "tcp" cidr_blocks = ["0.0.0.0/0"] } ingress { from_port = 80 to_port = 80 protocol = "tcp" cidr_blocks = ["0.0.0.0/0"] } egress { from_port = 0 to_port = 0 protocol = "-1" cidr_blocks = ["0.0.0.0/0"] } }
Task 1: Create an Auto Scaling Group 🏢
Auto Scaling Groups automatically add or remove EC2 instances based on the current demand. Follow these steps to create an Auto Scaling Group:
Create
main.tffile that contains the EC2 configuration along with auto-scaling configurations.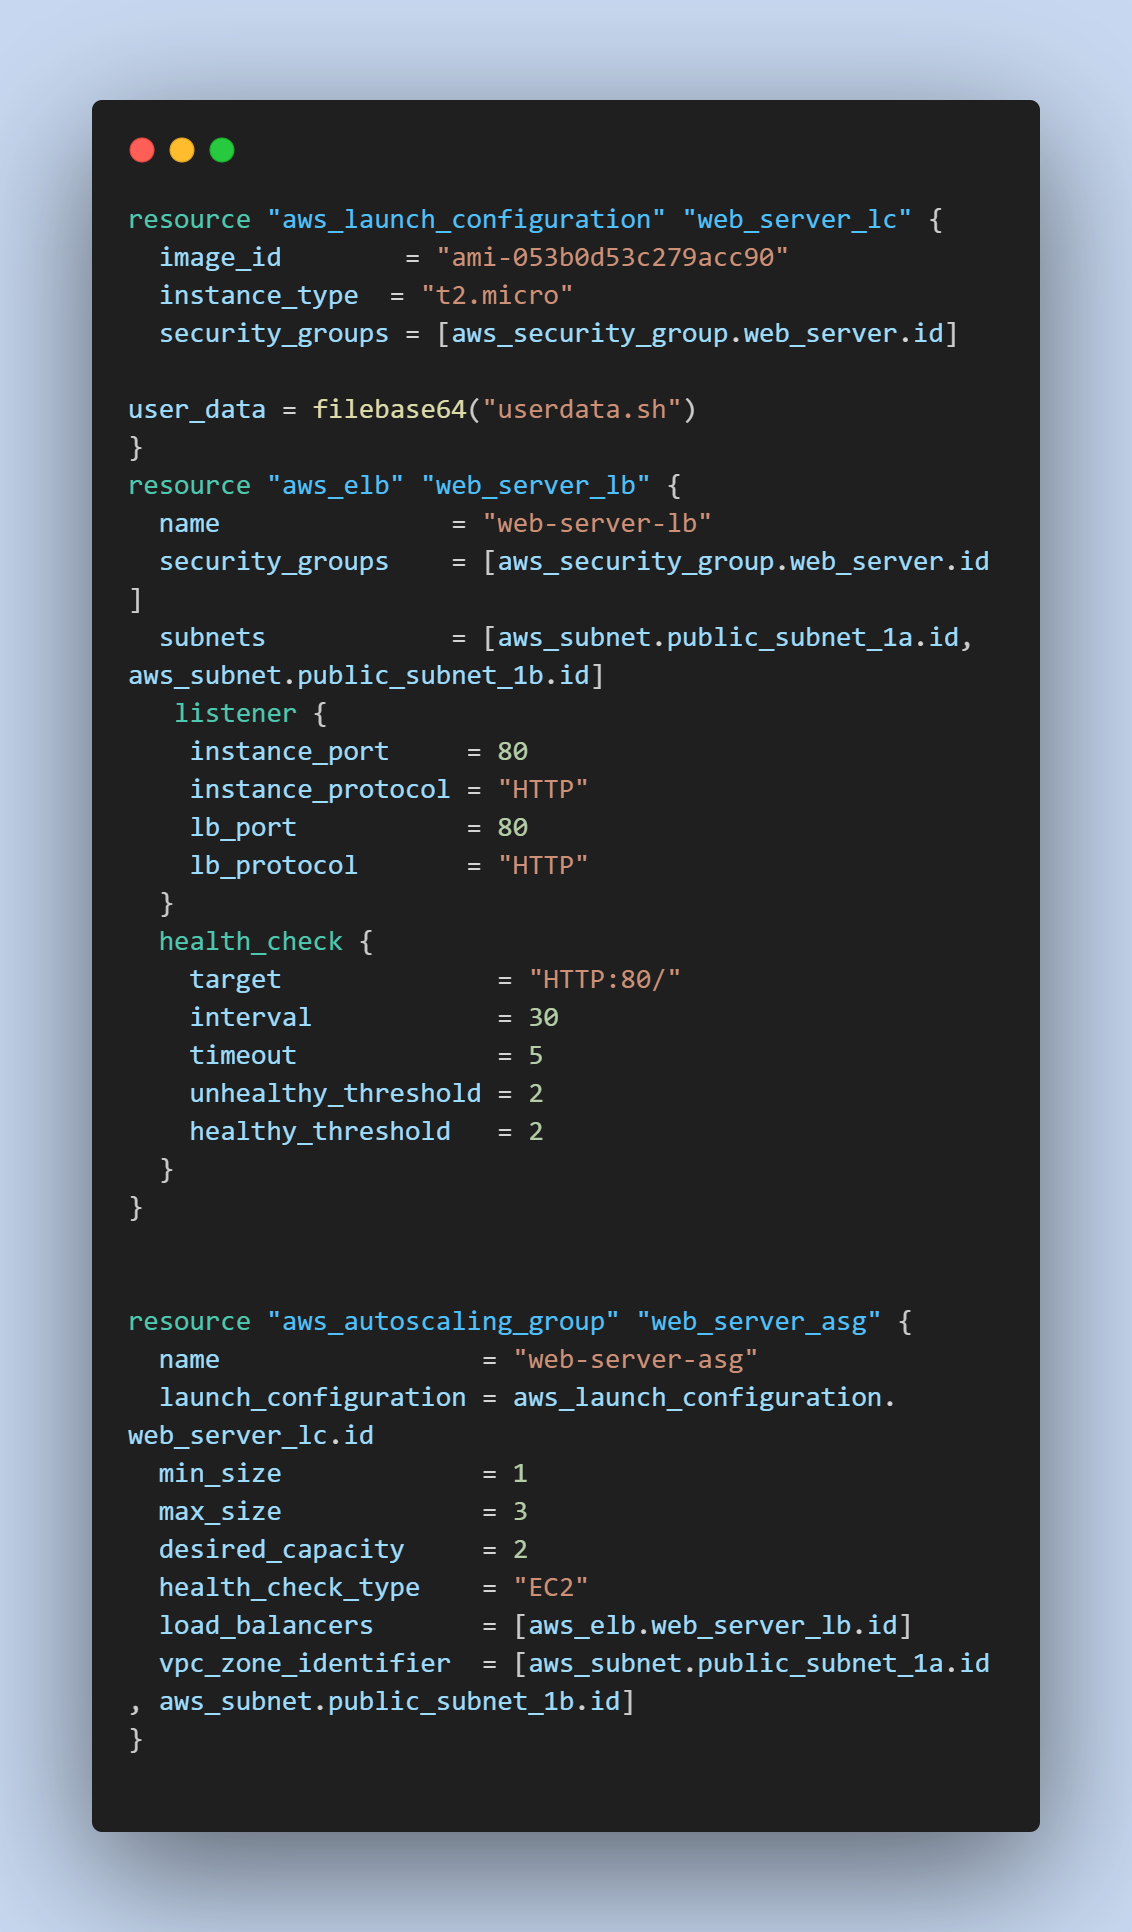
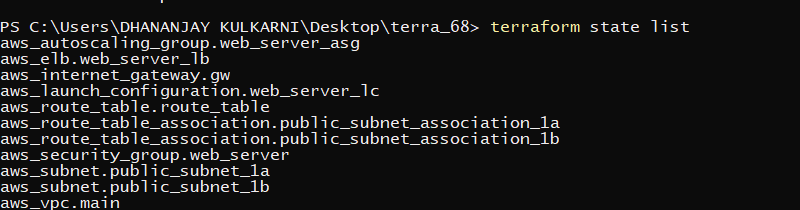
Run
terraform applyto create the Auto Scaling Group and all its dependent resources, as mentioned in the pre-requisites.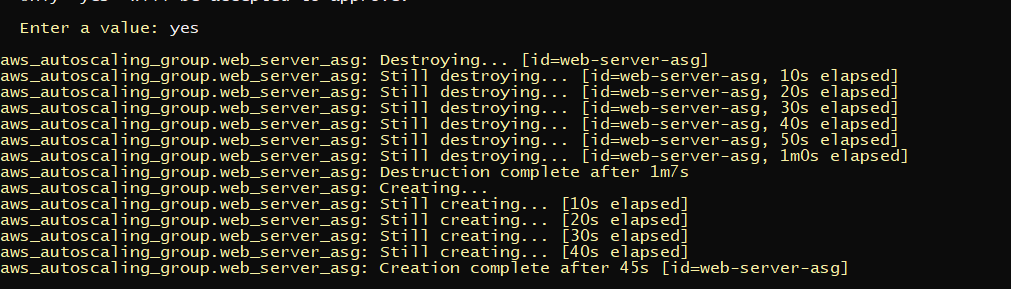
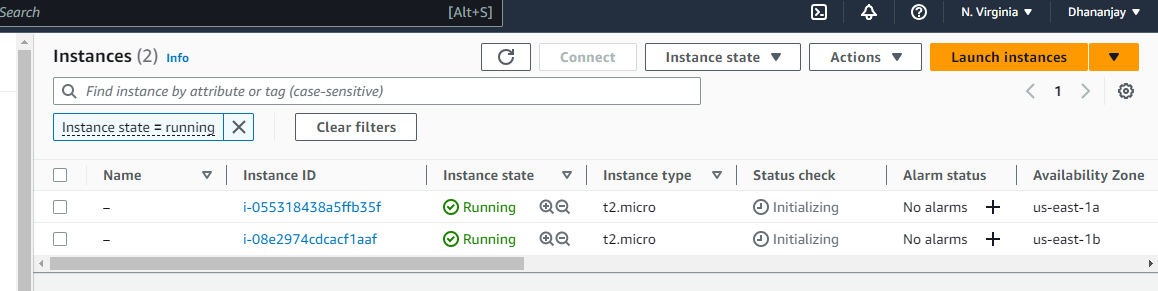
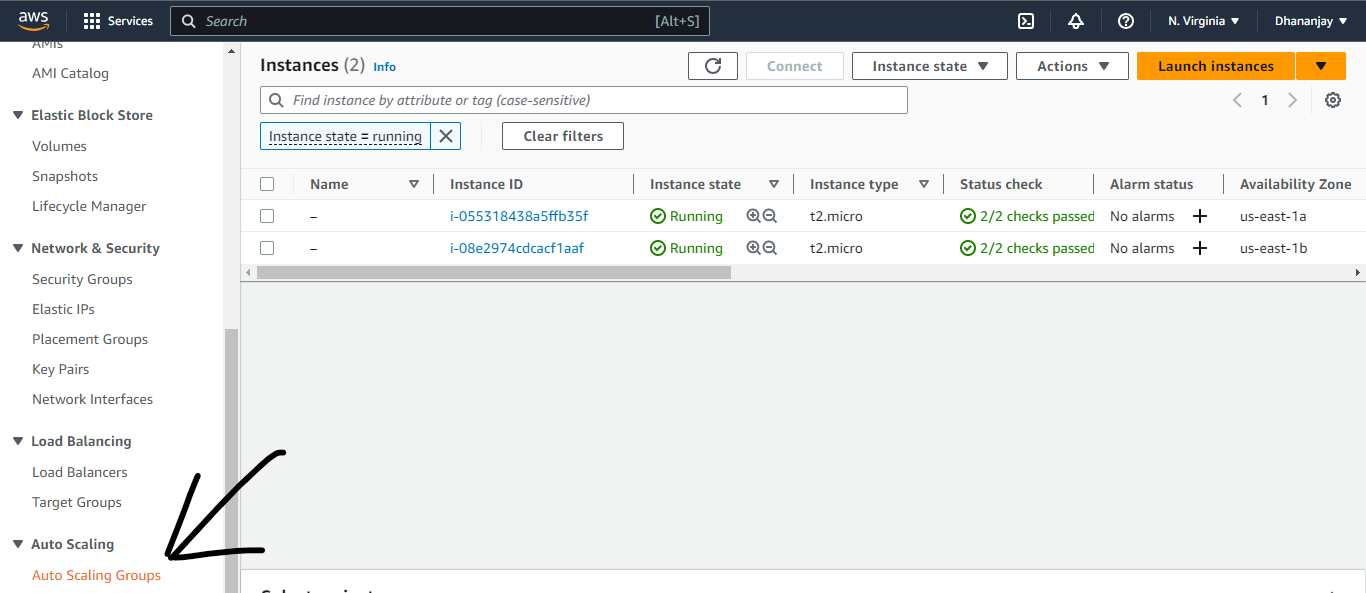
Let's navigate to the AWS Management Console to check the created Auto Scaling Group. Since we set the desired capacity to 2 in the auto-scaling Terraform configuration, there should be two instances created.
Task 2: Test Scaling 🧪
Go to the AWS Management Console and select the Auto Scaling Groups service.
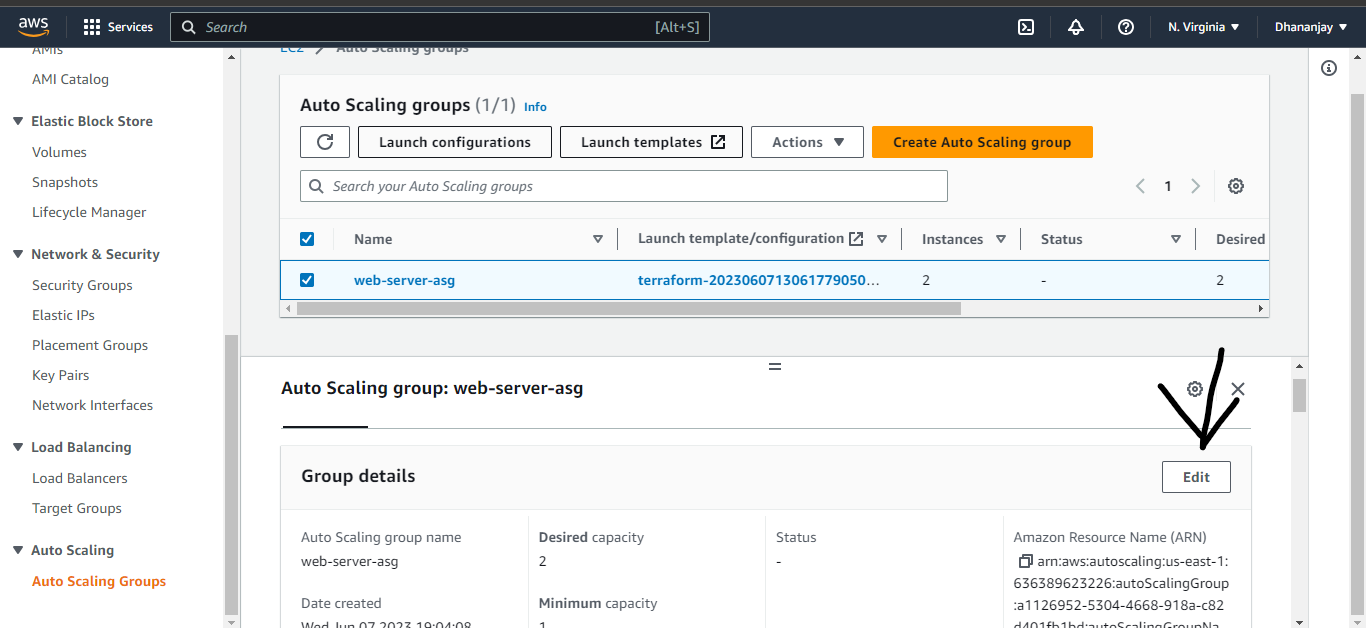
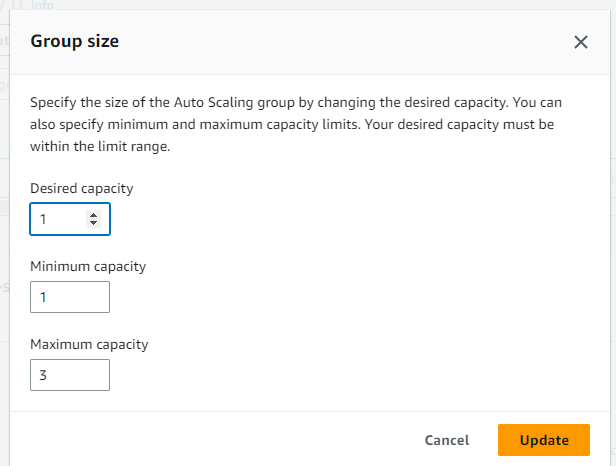
Choose the Auto Scaling Group you just created and click on the "Edit" button.
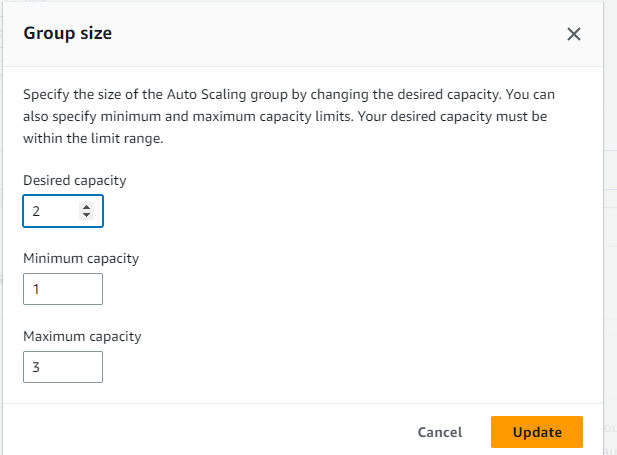
Increase the "Desired Capacity" to 3 and click on the "Save" button.
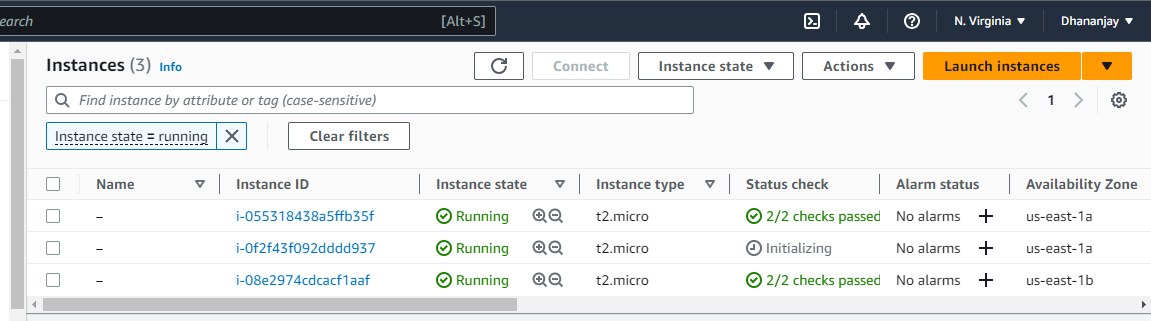
Wait a few minutes for the new instances to be launched.
Go to the EC2 Instances service and verify that the new instances have been successfully launched.
Decrease the "Desired Capacity" to 1 and wait for a few minutes for the extra instances to be terminated.
Check the EC2 Instances service again to ensure that the additional instances have been terminated.

That's it! Congratulations! 🎊🎉 You have successfully scaled your infrastructure using Terraform.
Happy Learning! 😊


