📝 AWS S3 Bucket Creation and Management 📦
Day 67 : #90DaysOfDevOps Challange

Passionate about building secure, scalable cloud environments. I specialize in AWS & Azure, with hands-on experience in DevOps automation, Python scripting, and infrastructure as code using Terraform.
Currently working in Cloud Security, where I focus on securing cloud-native architectures, implementing security best practices, and automating compliance workflows.
Always open to collaborating on innovative cloud projects that blend automation, security, and performance.
Welcome back to our AWS journey! Today, we will explore the fascinating world of Amazon S3 (Simple Storage Service) 🌐. S3 is not just any storage service, it's like a magical treasure chest 🎁 that offers industry-leading scalability, data availability, security, and performance. Whether you need to store and retrieve data, host static websites, or fulfill other use cases, S3 has got your back! Let's embark on a thrilling hands-on adventure and learn how to create and manage S3 buckets using Terraform. Let the magic begin! ✨🚀
Prerequisites ✨🔧
Before diving into the hands-on task, make sure you have the following prerequisites in place:
Terraform Installation 🌍🔧: Ensure that you have Terraform installed on your system. You can download and install Terraform from the official website: Terraform Downloads.
AWS Account 💻🌐: To perform the S3 bucket creation and management, you need an AWS account. If you don't have one, you can create a free account at AWS Free Tier.
Terraform Configuration Files 📄🧙♂️: Create the following configuration files in your project directory:
variables.tf🧩: This file will define any variables used in the Terraform configuration.provider.tf⚙️: This file will specify the AWS provider configuration.
AWS Provider Configuration ⚡️🌍: In the
provider.tffile, add the AWS provider configuration with the desired region. Here's an example of how it should look:provider "aws" { region = "us-east-1" }Replace
"us-east-1"with your preferred AWS region.Terraform Version Configuration 🏗️🔍: In your
terraform.tffile, add the required providers block to specify the version of the AWS provider you want to use:terraform { required_providers { aws = { source = "hashicorp/aws" version = "~> 4.0" } } }This ensures that Terraform uses the specified AWS provider version.
Make sure you have these prerequisites in place before proceeding with the hands-on task. Once you have everything set up, you'll be ready to create and manage your AWS S3 bucket using Terraform! 🚀💡
Task: Hands-On ✋💻
Step 1: Create an S3 Bucket using Terraform
To kickstart our journey, let's create an S3 bucket using Terraform. Follow these steps:
1️⃣ Open your preferred text editor and create a file named S3.tf. 2️⃣ Add the following Terraform code to define your S3 bucket resource:
resource "aws_s3_bucket" "devops_bucket" {
  bucket = "devopsbucketday67"
}
Feel free to replace "devopsbucketday67" with a unique name that resonates with your mission.
3️⃣ Save the file. Keep it safe, as we'll need it later.
Step 2: Initialize and Apply Terraform Configuration
1️⃣ Open your terminal or command prompt. Get ready to unleash the Terraform magic ✨.
2️⃣ Navigate to the directory where your S3.tf file resides.
3️⃣ Cast the spell "terraform init" to initialize Terraform and prepare for the enchanting changes:
terraform init
4️⃣ After the initialization is complete, cast the spell "terraform plan" to preview the magical changes that will take place:
terraform plan
Review the changes and ensure they align with your magical intentions.
5️⃣ Finally, utter the incantation "terraform apply" to bring the Terraform configuration to life and create the S3 bucket:
terraform apply
When prompted, embrace the magic and type "yes" to confirm the creation of the bucket.
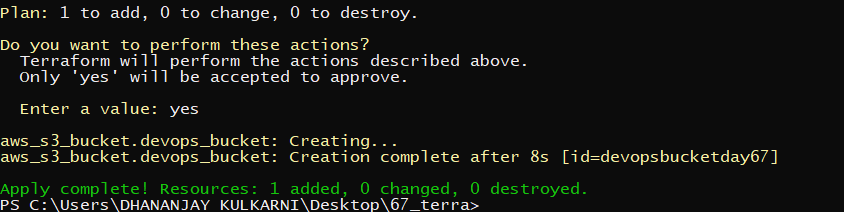
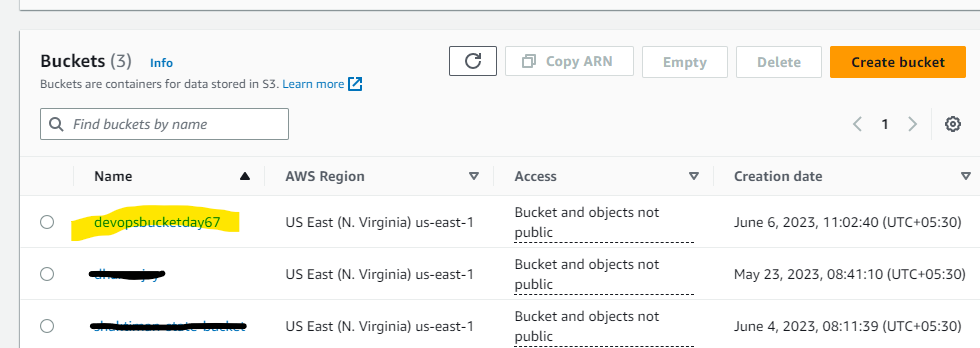
6️⃣ To witness the manifestation of your creation, navigate to the AWS Management Console and open the S3 service. Behold! Your bucket, named devopsbucketday67, has come to life! 🌟
Step 3: Configure the Bucket to Allow Public Read Access
Now that your bucket exists, let's grant public read access to the objects within it. Follow these steps:
1️⃣ Prepare yourself for the next spell. Create a file named public_access.tf. This will hold the configuration to grant public access to your bucket.
2️⃣ Channel your powers and add the following Terraform incantations to the public_access.tf file:
resource "aws_s3_bucket_public_access_block" "example" {
  bucket                     = aws_s3_bucket.devops_bucket.id
  block_public_acls          = false
  block_public_policy        = false
  ignore_public_acls         = false
  restrict_public_buckets    = false
}

resource "aws_s3_bucket_acl" "bucket_acl" {
  bucket = aws_s3_bucket.devops_bucket.id
  acl    = "public-read"
}
Ensure that aws_s3_bucket.devops_bucket.id references the correct identifier for your bucket.
3️⃣ Save the file. Keep your wand ready, as we're about to cast some powerful spells!
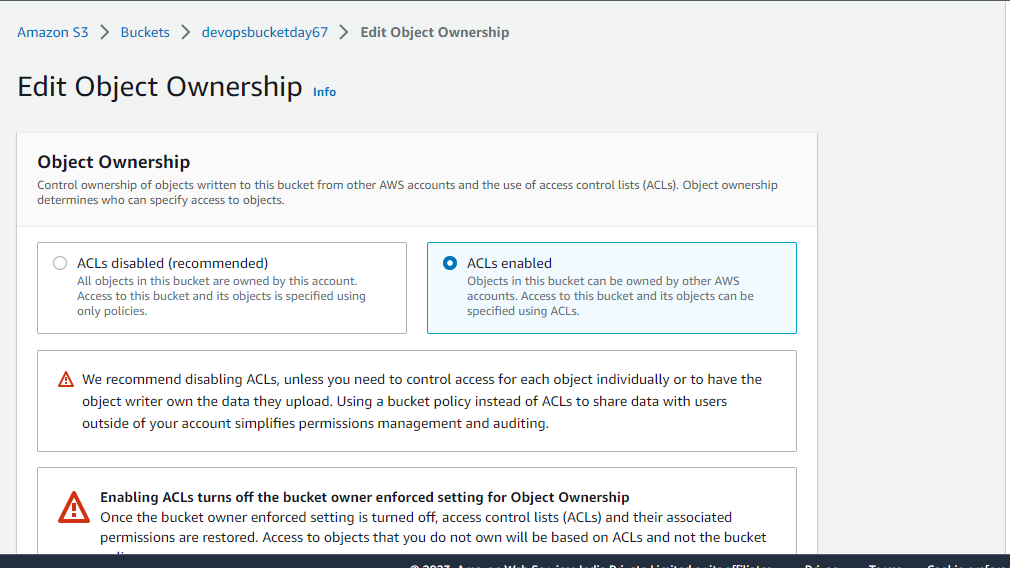
4️⃣ Enable the ACL in the S3 bucket by following these additional steps:
Open the AWS Management Console and navigate to the S3 service.
Find your bucket,
devopsbucketday67, and select it.Choose the "Permissions" tab.
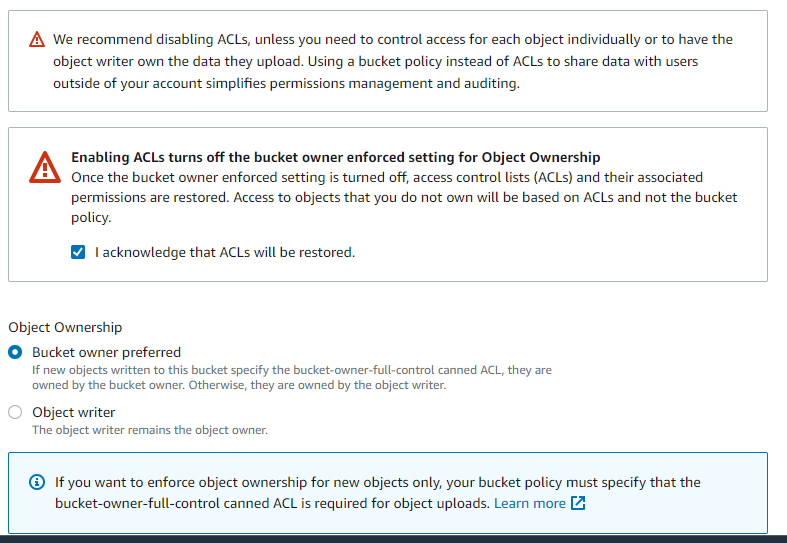
Under "Access Control List (ACL)", select "Bucket owner preferred".
Save the change.
Now your S3 bucket is not only publicly accessible but also configured with the preferred ACL settings. The magic of accessibility is at your fingertips! 🪄✨
5️⃣ Cast the spell "terraform apply" to apply the public access configuration to your S3 bucket:
terraform apply

Let the magic flow and watch as public access is granted to your bucket. Feel the power of openness! 🔓
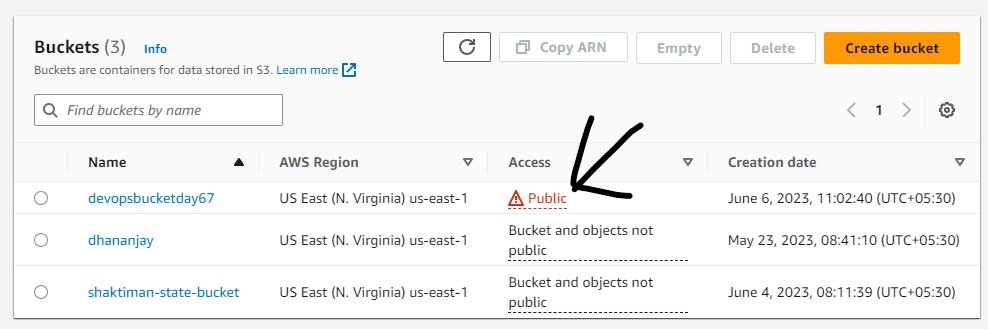
6️⃣ Check your bucket in the AWS Management Console. Behold! The doors to public access have been opened! 🚪🌐
Step 4: Create an S3 Bucket Policy for Read-Only Access
To control access to your bucket, let's create an S3 bucket policy that allows read-only access to a specific IAM user or role. Prepare yourself for the next enchantment:
1️⃣ Focus your magical energy and create a file named IAM.tf. This is where we'll define the configuration for IAM access to the S3 bucket.
2️⃣ Embrace the power of Terraform and add the following incantations to the IAM.tf file:
resource "aws_s3_bucket_policy" "bucket_policy" {
  bucket = aws_s3_bucket.devops_bucket.id
  policy = data.aws_iam_policy_document.allow_read_only_access.json
}

data "aws_iam_policy_document" "allow_read_only_access" {
  statement {
    principals {
      type        = "AWS"
      identifiers = ["arn:aws:iam::636389623226:user/Mark_furry"]
    }

    actions = [
      "s3:GetObject",
      "s3:ListBucket",
    ]

    resources = [
      aws_s3_bucket.devops_bucket.arn,
      "${aws_s3_bucket.devops_bucket.arn}/*",
    ]
  }
}
Make sure to replace "636389623226" with the identifier of the IAM user or role you want to grant read-only access to.
3️⃣ Save the file. Keep your wand close, for we are about to cast another mighty spell!
4️⃣ Cast the spell "terraform apply" to apply the IAM configuration and grant the specified access to the S3 bucket:
terraform apply
Witness the power of your incantations as read-only access is bestowed upon the chosen IAM entity! 📜🔒

5️⃣ Verify the bucket policy in the AWS Management Console. You've successfully wielded the magic of access control! 🧙♀️🔑

Step 5: Enable Versioning on the S3 Bucket
To add another layer of magic to your S3 bucket, let's enable versioning:
1️⃣ Open your trusty S3.tf file.
2️⃣ Enhance the existing Terraform incantations for the aws_s3_bucket resource by adding the versioning configuration:
resource "aws_s3_bucket" "devops_bucket" {
  bucket = "devopsbucketday67"

  versioning {
    enabled = true
  }
}
3️⃣ Save the file. Your wand shall be your guide as we continue our magical journey!
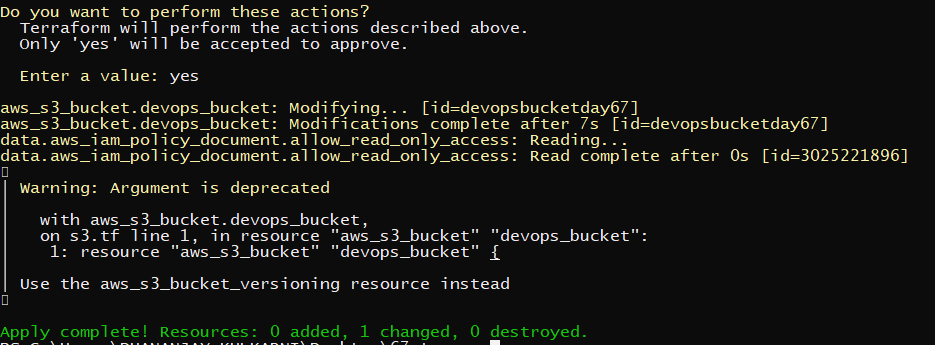
4️⃣ Cast the spell "terraform apply" once again to enable versioning in your S3 bucket:
terraform apply
Feel the surge of power as versioning is bestowed upon your bucket! Keep track of the enchanted versions! 📚✨
5️⃣ Behold the changes in the AWS Management Console for your S3 bucket. Versioning is now enabled! Witness the power of history unfolding before your eyes! 📜⏳
Code Availability🌟
You can access the complete code for this project on GitHub. The code is available in the following GitHub repository: [link here]
Feel free to explore the code, make modifications, and contribute to the project.
Congratulations! You have successfully created and managed an S3 bucket using Terraform. You've learned how to create a bucket, configure public read access, create a bucket policy for read-only access, and enable versioning. Your AWS journey has taken a leap forward! Continue exploring the vast possibilities and unleash the magic of Amazon S3. Happy cloud computing! ☁️💻✨


