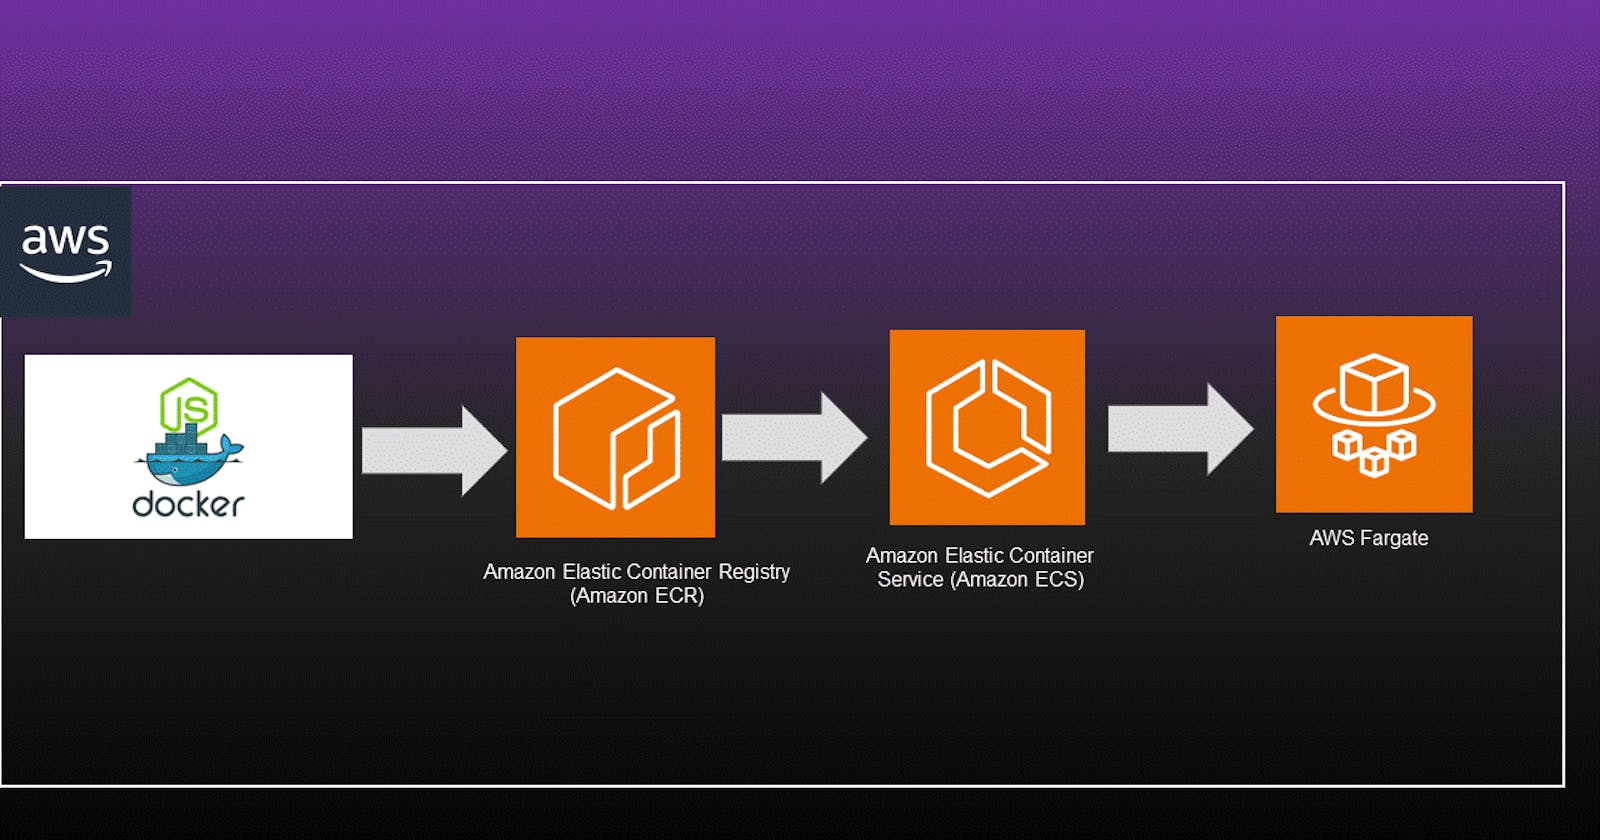
Project-6: Deploying a Node.js App on AWS ECS Fargate and ECR: Step-by-Step Guide 😃
Day 85: #90DaysOfDevOps Challange
Introduction 🚀
Welcome to this step-by-step guide on deploying a Node.js application on AWS ECS Fargate and AWS ECR. In this project, we will take you through the process of setting up an ECS cluster, creating a task definition, building a Docker image, and running the project. By the end of this tutorial, you will have your Node.js app up and running on AWS, ready to be shared with the world! 🌍
Prerequisites 📋
Before we dive into the deployment process, make sure you have the following prerequisites in place:
AWS Account: Create an AWS account if you don't have one already. You can sign up here, and launch an EC2 instance and keep it ready.

Node.js App: We will use the Node.js application from GitHub as our example project. Clone or download the repository to get started.
git clone https://github.com/Dhananjaykul/node-todo-cicd.git
AWS CLI: Install the AWS Command Line Interface (CLI) on your local machine to interact with AWS services. You can find installation instructions here. For Ubuntu use below command :
 sudo apt-get update -y
 sudo apt-get install awscli
Step 1: Build the Docker Image 🐳
In this step, we'll build the Docker image for our Node.js application.
Navigate to the root directory of the cloned Node.js app repository.
Locate the
Dockerfilein the repository. This file contains instructions for building the Docker image.Make sure to install docker
sudo apt-get install docker.ioOpen a terminal or command prompt and run the following command to build the Docker image:
sudo docker build . -t node-todo-app
Step 2: Setup AWS CLI and Login 🔧
To push the Docker image to AWS ECR, we need to set up the AWS CLI and log in to our AWS account.
Install AWS CLI: If you haven't installed the AWS CLI already, refer to the prerequisites section for the installation link.
Create IAM user with all required permissions as shown below


Keep Everything default and continue

Configure AWS CLI: Run the following command and enter your AWS access key, secret key, region, and output format as prompted:
aws configure

Step 3: Create an ECR Repository 🏭
Before we can push our Docker image to ECR, we need to create a repository for it.
In the AWS Management Console, navigate to the Elastic Container Registry (ECR) service.

Click on "Create repository."
Enter a name for your repository, such as "node-app-repo"


Configure the repository settings as needed, or leave them as default.
Click "Create repository" to create the ECR repository for your Docker image.

Click on "View push commands"
And Follow the on screen instructions.


Step 4: Setup ECS Cluster 💻
Next, let's set up an ECS cluster to run our Node.js application.
Sign in to your AWS Management Console.
Navigate to the ECS service.
Click on "Clusters" in the left sidebar and then click "Create Cluster."

Choose the "Networking Only" cluster template for simplicity.
Give your cluster a name, such as "NodeAppCluster"
Configure the networking settings as per your requirements.
Review the settings and click "Create." 🌐


Step 5: Create Task Definition with a New Role 📦
A task definition is required to specify how our containerized application should run within the ECS cluster. In this step, we will create a new task definition and set up a new IAM role to meet the specific needs of our Node.js application.
In the ECS service dashboard, click on "Task Definitions" in the left sidebar.
Click on "Create new Task Definition."


Click next
Select "Fargate" as the launch type compatibility.

Choose a task role based on your application's needs or create a new one.

I kept rest of the things default
If you need to create a new role:
Click on the "Create new role" button.
This will redirect you to the IAM console.
Click on "Create role."
Choose the service that will use this role (ECS in this case).
Select "Allows ECS tasks to have permissions within your AWS resources."
Click "Next" until you reach the "Tags" section (you can add tags if necessary), and then click "Next" again.
Give your role a name, such as "ECS-NodeApp-Role," and provide a description if desired.
Click "Create role" to create the new IAM role.
Back in the ECS console, you should see your newly created role in the dropdown list.
Click "Add container" and fill in the container details:
Once you have configured all the container details and task requirements, click "Add" to add the container to the task definition.
Review all the settings to ensure they are correct.
Click "Create" to save the task definition.
Your task definition is now ready to be used to run your Node.js app on AWS ECS Fargate! 🎉

Step 6: Run the Project ▶️
With the task definition in place, it's time to run our Node.js app on ECS Fargate.
In the ECS service dashboard, select the cluster you created earlier.
Click on the "Tasks" tab and then click "Run new Task."

Choose your task definition from the dropdown.
Configure the task settings as per your requirements, such as the number of tasks to run, VPC, subnets, etc.


Click "Run Task" to start running your Node.js app on ECS Fargate! 🚀

Conclusion 🎉
Congratulations! You have successfully deployed a Node.js application on AWS ECS Fargate and AWS ECR. Now, your application is accessible through the public IP or load balancer associated with the ECS Fargate tasks.
If this blog helped you, remember to share your achievements on LinkedIn, tag me and showcase your cloud computing skills!
Happy coding and sharing! 😊